This post covers how to implement alerts in your application using the latest strategies in SwiftUI
Updated for Xcode 13.0 beta 4
SwiftUI lets us show alerts to the user with its alert() modifier, but how that works depends on whether you’re targeting iOS 15 and later or whether you need to support iOS 13 and 14 too. I'll be showing in here how to do it in both ways (iOS 13,14 and 15). The newer iOS 15 approach is preferable because it builds on standard SwiftUI buttons.
iOS 15,*
To show an alert, create some Boolean state that determines whether the alert should be visible, then attach that to an alert() modifier along with all the buttons you want to show in the alert. All buttons dismiss the alert when tapped, so you can provide an empty action for simple dismissal.
How to add actions to alert buttons
Not needed in iOS 15 – you should use buttons directly.
struct ContentView: View {
    @State private var showingAlert = false

    var body: some View {
        Button("Show Alert") {
            showingAlert = true
        }
        .alert(isPresented:$showingAlert) {
            Alert(
                title: Text("Important message"),
                message: Text("Wear sunscreen"),
                dismissButton: .default(Text("Got it!"))
            )
        }
    }
}
DEMO:
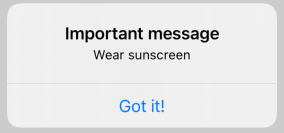
Tip: Presenting an alert like this will automatically set showingAlert back to false when the button is tapped.
You can provide as many buttons as you need, and if you don’t have any with the .cancel role then an extra Cancel button will automatically be provided. For example, this shows three buttons plus Cancel:
struct ContentView: View {
    @State private var showingAlert = false

    var body: some View {
        Button("Show Alert") {
            showingAlert = true
        }
        .alert("Important message", isPresented: $showingAlert) {
            Button("First") { }
            Button("Second") { }
            Button("Third") { }
        }
    }
}
DEMO:
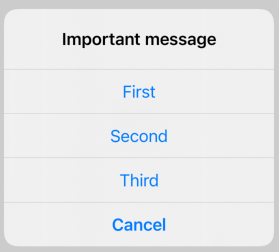
As these are standard SwiftUI buttons, you can assign other roles such as .destructive to have the system style them appropriately.
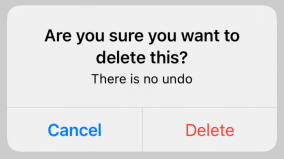
However, you will often want to attach actions to buttons to perform specific actions when they are tapped. To do that, attach a closure to your button that will be called when it’s tapped, like this:
struct ContentView: View {
    @State private var showingAlert = false

    var body: some View {
        Button("Show Alert") {
            showingAlert = true
        }
        .alert(isPresented:$showingAlert) {
            Alert(
                title: Text("Are you sure you want to delete this?"),
                message: Text("There is no undo"),
                primaryButton: .destructive(Text("Delete")) {
                    print("Deleting...")
                },
                secondaryButton: .cancel()
            )
        }
    }
}
DEMO:
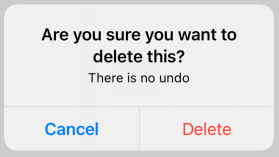
There is no way to add more than two buttons to an alert – if you’re looking to do that you should use an action sheet instead.
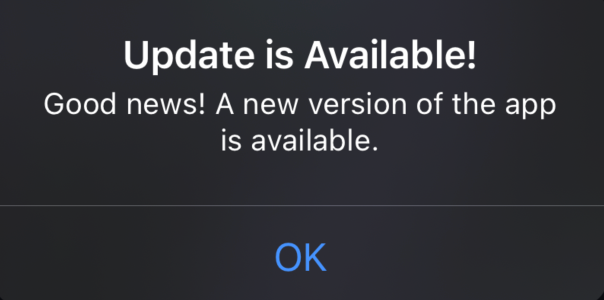
Alert with Actions
.alert(isPresented: $showUserUpgradeAppAlert) {
    Alert(
        title: Text("Update is Available!"),
        message: Text("Good news! A new version of the app is available."),
        dismissButton: .default(Text("Update")) {
            // Your actions
        }
    )
}
DEMO:
iOS 13-14
How to add actions to alert buttons in SwiftUI
Basic SwiftUI alerts look like this:
Alert(title: Text("Important message"), message: Text("Wear sunscreen"), dismissButton: .default(Text("Got it!")))However, you will often want to attach actions to buttons to perform specific actions when they are tapped. To do that, attach a closure to your button that will be called when it’s tapped, like this:
struct ContentView: View {
    @State private var showingAlert = false

    var body: some View {
        Button(action: {
            self.showingAlert = true
        }) {
            Text("Show Alert")
        }
        .alert(isPresented:$showingAlert) {
            Alert(title: Text("Are you sure you want to delete this?"), message: Text("There is no undo"), primaryButton: .destructive(Text("Delete")) {
                    print("Deleting...")
            }, secondaryButton: .cancel())
        }
    }
}
DEMO: