
Learn how to access a GUI on AWS EC2 macOS instance with ease in this comprehensive guide. From setting up to benefits, this post will provide all the information you need to improve your computing experience.
Accessing a graphical user interface (GUI) on an Amazon Web Services (AWS) Elastic Compute Cloud (EC2) instance running macOS can seem daunting, but it's actually a straightforward process. In this post, we'll explore the steps to take to set up a GUI on your EC2 instance and why you might want to do so in the first place. Whether you're a seasoned AWS user or just getting started, this guide will provide you with all the information you need to access the GUI of your EC2 macOS instance with ease.
Let's create a use case for this... We want to setup an EC2 instance for a workflow runner on Github.
You may have encounter errors like this:
xcode-select: error: tool 'xcodebuild' requires Xcode, but active developer directory '/Library/Developer/CommandLineTools' is a command line tools instance
That's because Xcode is not installed and for that we need to install it, and in order to do that you need to use the GUI.
Setup user
First we need to give your ec2 root user a password (we'll revoke this later as this is not a good practice).
- Log in into the ec2 instance with ssh
- Create a new password for the ec2 user with:
sudo passwd ec2-user(where ec2-user is your ssh user)
Enable the Apple Remote Desktop (ARD) service
Next we need to allow our instance to connect remotely with the following:
sudo /System/Library/CoreServices/RemoteManagement/ARDAgent.app/Contents/Resources/kickstart -activate -configure -access -on -clientopts -setvnclegacy -vnclegacy yes -clientopts -setvncpw -vncpw password1 -restart -agent -privs -allExplanation
/System/Library/CoreServices/RemoteManagement/ARDAgent.app/Contents/Resources/kickstart: This is the executable file that enables and configures the ARD service.-activate: This option activates the ARD service on the computer.-configure: This option configures the ARD service with the options specified in the rest of the command.-access: This option enables remote access to the computer.-on: This option turns the ARD service on.-clientopts: This option sets various client options for the ARD service.-setvnclegacy: This option sets the VNC (Virtual Network Computing) protocol to use the legacy version.-vnclegacy yes: This option specifies that the legacy version of the VNC protocol should be used.-clientopts: This option sets various client options for the ARD service.-setvncpw: This option sets the password for accessing the computer through the VNC protocol.-vncpw password1: This option specifies the password to be used for accessing the computer through the VNC protocol. The password in this example is "password1".-restart: This option restarts the ARD service after it has been configured.-agent: This option specifies that the ARD service should be started as an agent.-privs: This option sets the privileges for the ARD service.-all: This option gives the ARD service all available privileges.
In summary, this command enables and configures the ARD service on a Mac computer, setting the VNC protocol to use the legacy version with a password of "password1", and giving the ARD service all available privileges.
Remote into the instance
Next you have 2 ways of accessing the instance, a secured and a non-secured way.
Secured way (ssh)
For this we'll use ssh
ssh -L 5900:localhost:5900 -N -i yourAWSKey.pem your_user@your_public_IPv4_addressExplanation
The command above is for establishing a secure shell (SSH) tunnel between your local computer and a remote server. Here's what each part of the command does:
ssh: This is the command for starting an SSH session.-L 5900:localhost:5900: This option specifies the forwarding of the local port 5900 to the remote host's port 5900. In other words, this option maps the local port 5900 to the remote host's port 5900.-N: This option tells SSH not to execute a remote command. This is useful when only forwarding ports.-i yourAWSKey.pem: This option specifies the private key file (in this case,yourAWSKey.pem) to use for authentication.your_user@your_public_IPv4_address: This is the remote hostname and the username to log in as. Theyour_public_IPv4_addressis the public IPv4 address of the remote server, andyour_useris the username used to log in to the remote server.
In summary, this command creates an SSH tunnel that forwards the local port 5900 to the remote host's port 5900, using the private key file yourAWSKey.pem for authentication, and logging in as the user your_user to the remote server at the public IPv4 address your_public_IPv4_address. This SSH tunnel can be used to securely access the remote host's graphical desktop environment, such as the X Window System, through a Virtual Network Computing (VNC) connection.
here's an example:
ssh -L 5900:localhost:5900 -N -i macInstance.pem [email protected]
Next, leave that command running on the terminal and navigate to the browser and enter the following on the navigation bar:
vnc://localhostExplanation
The command vnc://localhost is a URL that specifies the location of a VNC server. In this case, the VNC server is running on the local host (localhost).
This URL is used to connect to the VNC server running on the remote host through the SSH tunnel established by the previous ssh command. When you connect to the VNC server using this URL, the data transmitted between your local computer and the remote host is encrypted by the SSH tunnel, providing a secure way to access the graphical desktop environment of the remote host.
In summary, this command specifies the location of the VNC server running on the local host, which was forwarded through the SSH tunnel established in the previous ssh command.
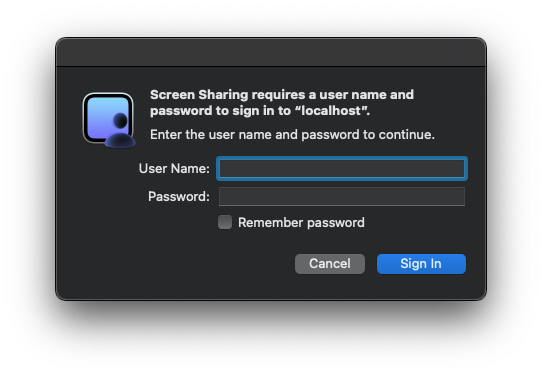
Next it will prompt you to enter the username and password, this would be your ec2-user and the pw you created in the previous steps:
Now you should be logged in using a GUI 🎉
Non-secured way (port open)
For this we can open a Custom TCP port allowing all incoming connections to the instance (needless to say how unsecured this is...).
- Go to the security group of your instance and create a new inbound rule
- The type should be:
Custom TCP, protocolTCPand port5900

Mext let's connect:
- Open on your mac the "Screen Sharing" app
- Copy the
Public IPv4 addressof your EC2 instance and paste it there - Paste your
ec2-useruser and the password you created
Now you should be logged in using a GUI 🎉
Clean up!
If you want to revert the changes made by Remote Desktop (ARD) service because you are done with the GUI, follow the steps:
- Delete the inbound rule you created on the security group (if you used the non-secured way to connect above)
- Remove the password for the ec2-user:
sudo dscl . -passwd /Users/ec2-user ""If you try to log in back using any of the methods above you'll find that you now can't log in with the pw. - Revert the Remote Desktop (ARD) service:
sudo /System/Library/CoreServices/RemoteManagement/ARDAgent.app/Contents/Resources/kickstart -deactivate -configure -access -offYou should get this message:
Starting...
Removed preference to start ARD after reboot.
ec2-user: Set user remote access.
Done.
That was all, this was very tricky to setup, If you know anyone who might need this, share it 🙌🏻
With love and respect,
Arturo 👨🏻💻
