XCode 13 now makes this process extremely easy, so let's cover from start to finish how to do this! 🤓
Note: This method is for XCode 13+, if you have an older version it might not work.
Now the Swift Compiler does the heavy lifting of extracting the strings, and the amount of work you need to do is trivial, it gets much closer to the famous “it just works” motto.
Table of Content
I'll divide this post in 3 sections:
- Get XCode ready to find the
Stringsautomatically for us - Add more languages to our app
- Steps to take when publishing to the App Store
As side note, here's the official Apple documentation.
1. Turn on localization settings
In Xcode, choose your project, then Build Settings and filter the list for Localization settings. Turn everything to Yes, specifically:
- Localization Export Supported
- Localization String SwiftUI Support
- Use Compiler to Extract Swift Strings

Add your languages
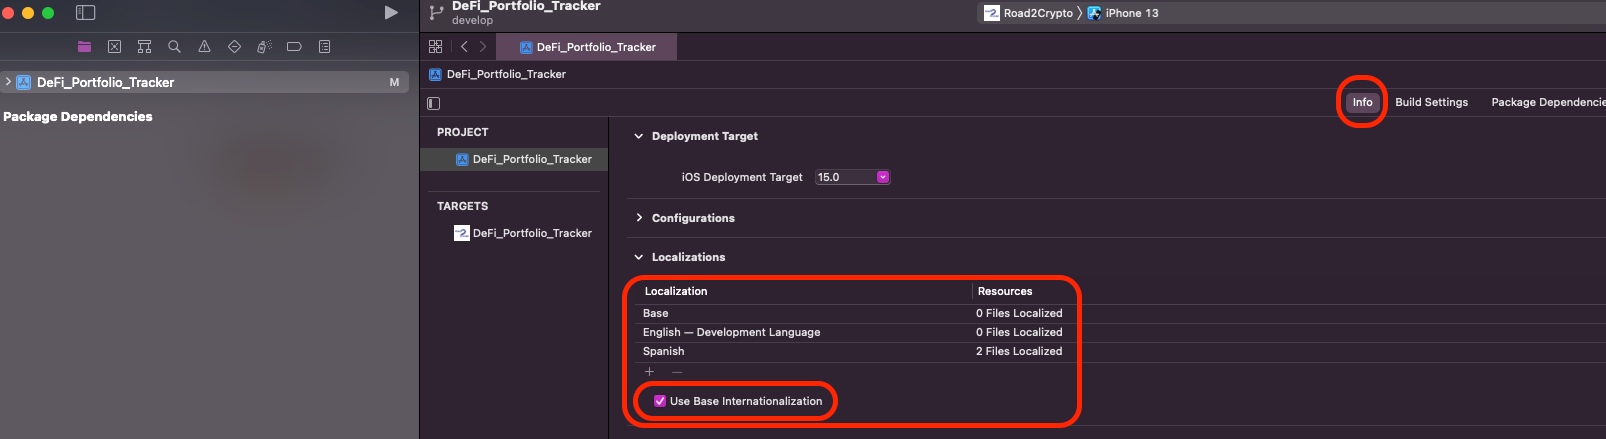
Now, head over to the Info panel. Base localization should be turned on by default (if it's not, check the box), and add at least one new language by clicking on the icon.
Base internationalization places all your shared resources in the same place. Then, it creates folders and copies of resources that need to be different for each language. Mostly that includes the .strings files with the translation of each piece of text in your app. But, should you choose, it can also mean different image resources. Maybe you want a French flag to appear on your French localization, for instance.
What we just did & Important cases
Now the compiler will recognize all the Strings automatically for us, how? whenever you use Text() with your string literals the compiler will recognize it, for example:
Button(action: info) {
    Text("Road2Crypto", comment: "Button to show information about the portfolio tracker")
}
The comment is a line left by the engineer to the translator so it's easier to understand the text functionality.
There are some special cases, for example when passed a String in a navigation view, they won't automatically be exported for localization, in this case we have to specify it by changing String to type LocalizedStringKey. So in the target view, add it as follow:
import SwiftUI

struct CardActionButton: View {
    var label: LocalizedStringKey
//...
That LocalizedStringKey type is the magic that makes SwiftUI localization in Xcode 13 so easy. The first argument to Text() is the LocalizedStringKey type, and all LocalizedStringKey texts are automatically exported for localization by the Xcode 13 compiler.
Another workaround for the above, if you don't want to have the label in the new view as LocalizedStringKey is to directly convert it like:
String.localizedStringWithFormat(NSLocalizedString("My Text", comment: "some comment here"))The above is the same as Text("My Text")
You're all set now, and ready to export your texts for your translators.
2. How to Translate to other languages
Let's say that you added Spanish and your default development language is English. Now you can go to the XCode menu` -> Products -> Export Localizations... and open the file es.xcloc and start recording your translation.
Make sure you either manually create one for English, or change something simple on the en.xcloc as well so it can create the English localization file. The app only recognize the languages based on those files (see below).

One method to test easily your translations is by going to Edit Scheme -> Run -> Options and change the App Language to System Language. Now when you bring the app on the simulator, you can change the languages inside and it will automatically be translated.
3. Publishing new languages to the App Store
Go to App Store Connect and go to your app as if you were going to submit a new version, then go to App Information under General.
On the right side of Localizable Information select your new language to add.
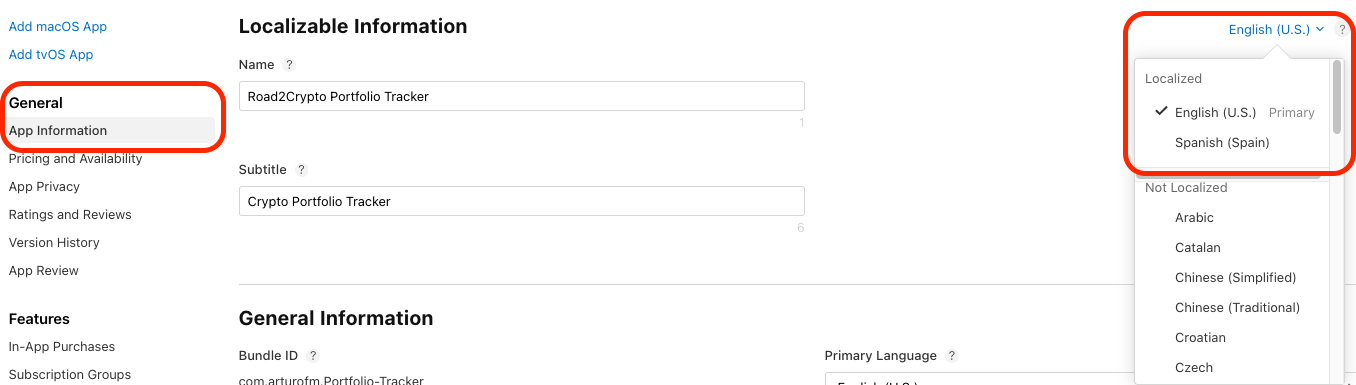
Make sure you select your primary language under that:

Official documentation can be found here.
If you know anyone who might need this, share it :)
With love and respect,
Arturo 👨🏻💻
