Updated: Jul 8, 2022
I will be following the official doc. provided by apple, of course in this post I show code and it goes to the point.
Note: To implement Apple Pay, you must have an Apple Developer’s Account. Learn more about the developer’s program.
Step 1 - Create Certificates, Price and more
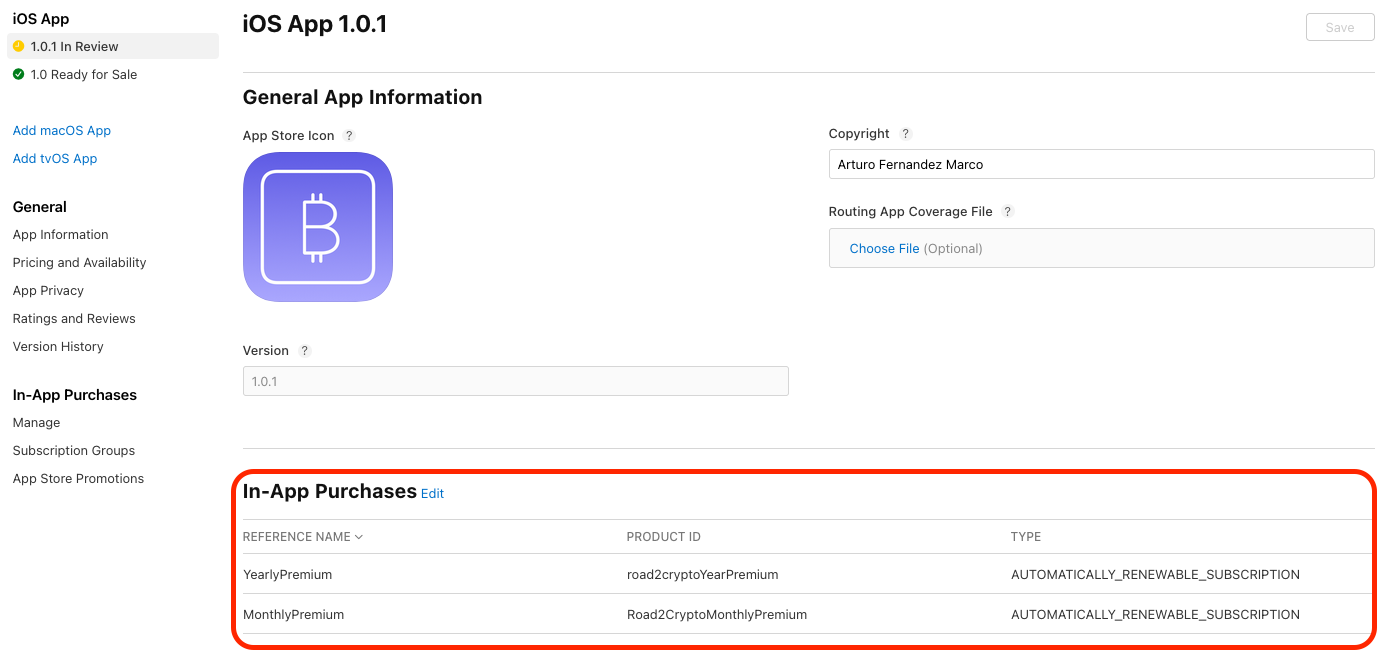
1- Go to App Store Connect and from My Apps, select your app.
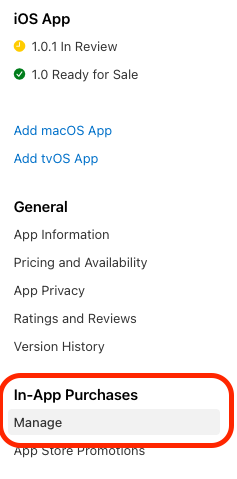
2- In the sidebar under In-App Purchases, click Manage.
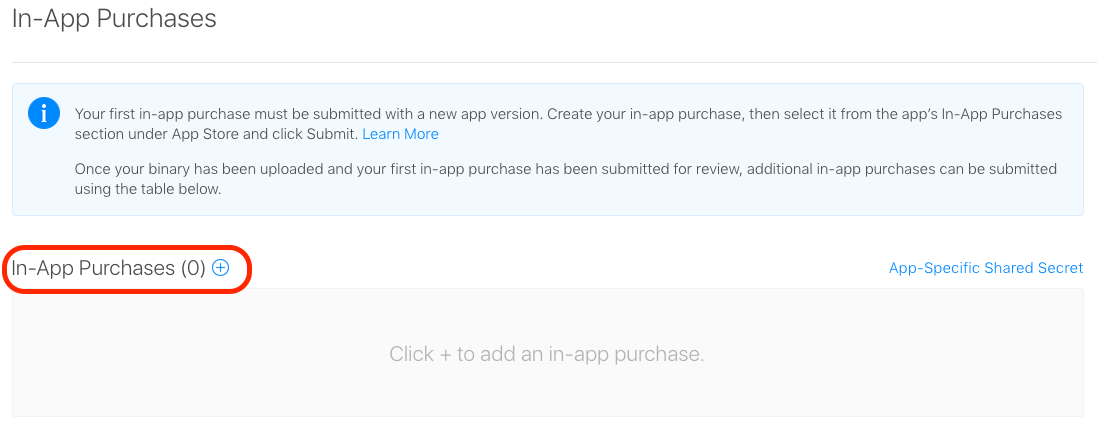
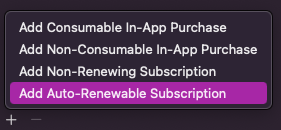
3- To add an in-app purchase, click the Add button (+) and select for example: Auto-Renewable Subscription.
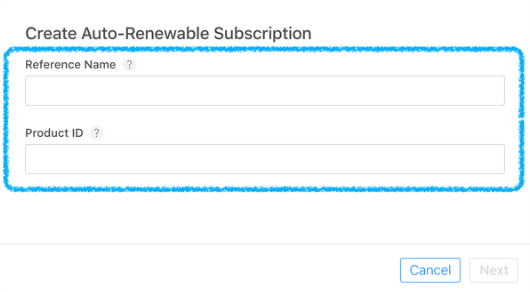
4- Enter a Reference Name that clearly tells you what in-app section this specific purchase will unlock. Also, make note of the Product ID you enter since you will need to enter the Product ID on your app’s control panel as well.
For example:
Reference Name: YearlyPremium
Product ID: road2cryptoYearPremium
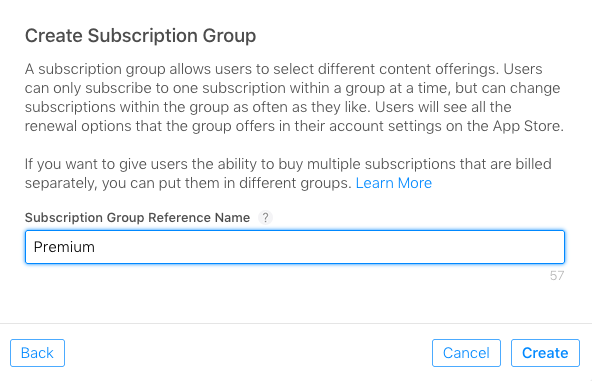
5- Create the group in which you will have multiple items for the user to subscribe.
Fill the necessary information next such as Subscription Prices, etc...
Add App Review information
Add Review Notes and an image to help Apple review your in-app purchase.
Note: The screenshot (requires at least 640 x 920 pixels) and the information you provide will not be shown on the App Store. The screenshot and information are only for Apple’s review purposes.
6- After the subscriptions are ready for review and no metadata is missing, add it for your next app review:
Step 2 - Select your type of In-App Purchase from below.
Auto-renewable Subscriptions
Auto-renewable subscriptions give users access to content, services, or premium features in your app on an ongoing basis. At the end of each subscription duration, the subscription automatically renews until a user chooses to cancel it. Users can subscribe on iOS, iPadOS, macOS, watchOS, and tvOS. Learn more about subscriptions.
Getting Ready
To offer subscriptions (a type of in-app purchase) you’ll need to implement StoreKit APIs in your app, configure your subscriptions in App Store Connect and assign them to a subscription group (a group of subscriptions with different access levels, prices, and durations that users can choose from). After creating your subscriptions, include details such as a name, pricing, and description. This information displays in the In-App Purchases section of your app’s product page. Ensure that the subscriptions are available across all device types that your app supports. Consider including a way for subscribers to see the status of their subscription, along with upgrade, crossgrade, and downgrade options, and a deep link to easily manage or turn off their subscription from within your app.
85% Net Revenue After One Year
The net revenue structure for auto-renewable subscriptions differs from other business models on the App Store. During a subscriber’s first year of service, you receive 70% of the subscription price at each billing cycle, minus applicable taxes. After a subscriber accumulates one year of paid service, your net revenue increases to 85% of the subscription price, minus applicable taxes.
Small developers who earn less than 1 million/year get a 15% tax rate instead of 30% as of 2020
Note: If the user cancels a subscription — and doesn’t renew it within 60 days — or switches to another subscription group (more on that later), the number of days counting to the one-year mark is reset. So, make sure your subscription offers an experience your users will want to keep for the long run.
Code Implementation
I will not be covering how to create a button with a fetch request, there is an excellent example provided by apple here. Download it and dig into it. However let me show you how you can test inside XCode the purchases (this is only local):
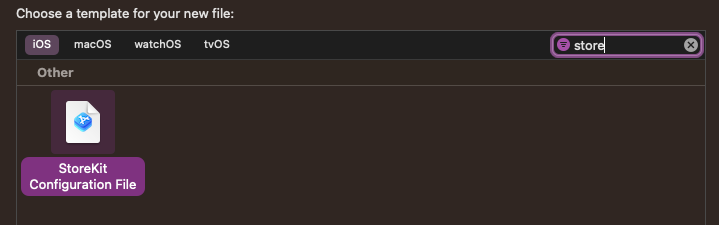
Create a StoreKit test file
Create a new file and select StoreKit Configuration File, I named mine: Products
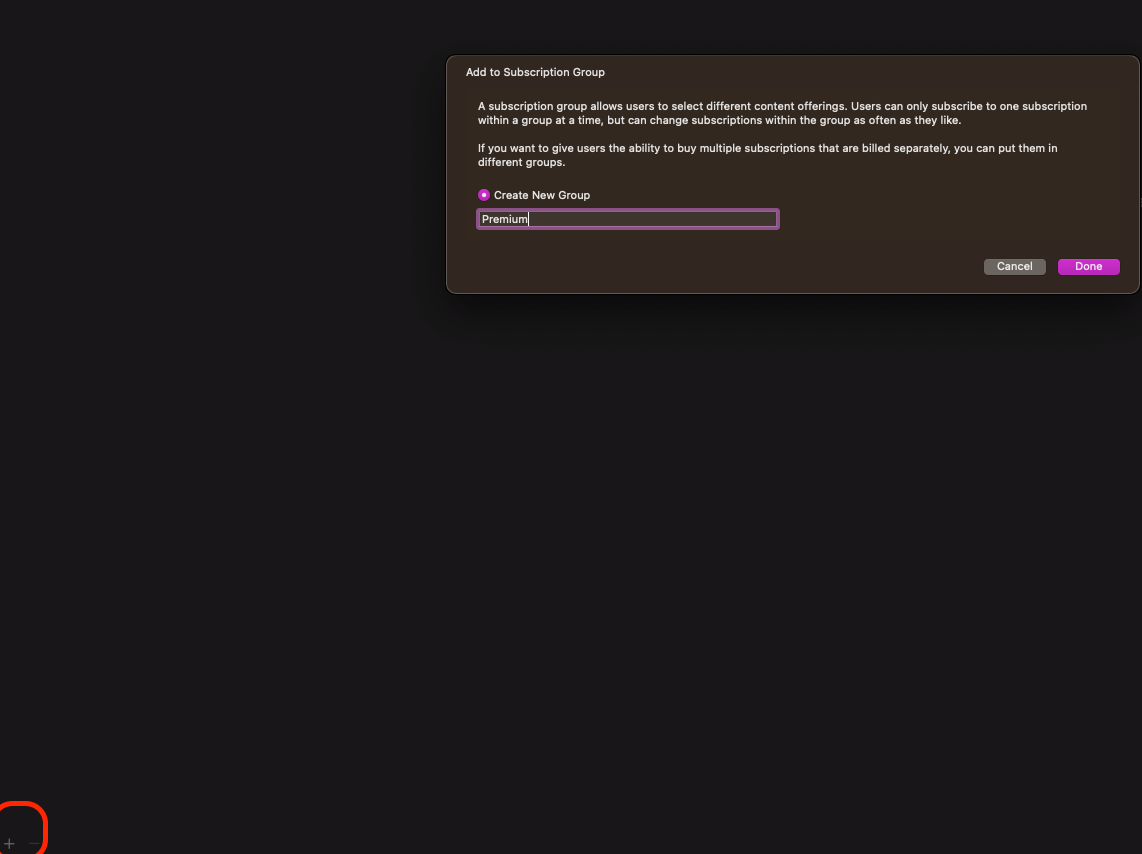
Select the file in XCode and create a new Auto Subscription Group:
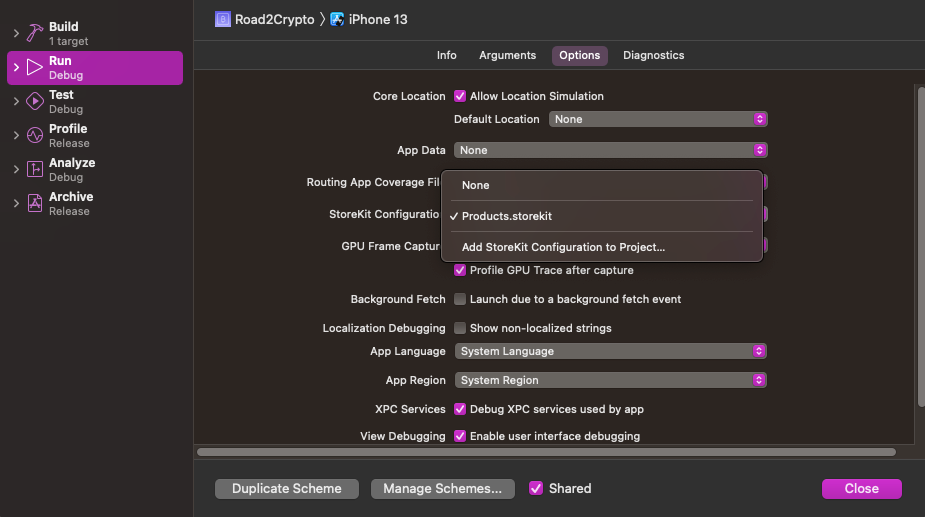
By default, StoreKit testing in Xcode is disabled. Follow these steps to select the Products.storekit configuration file and enable StoreKit testing in Xcode:
- Click the scheme to open the scheme menu; choose Edit Scheme.
- In the scheme editor, choose the Run action.
- Click Options in the action settings.
- For the StoreKit Configuration option, select the
Products.storekitconfiguration file.
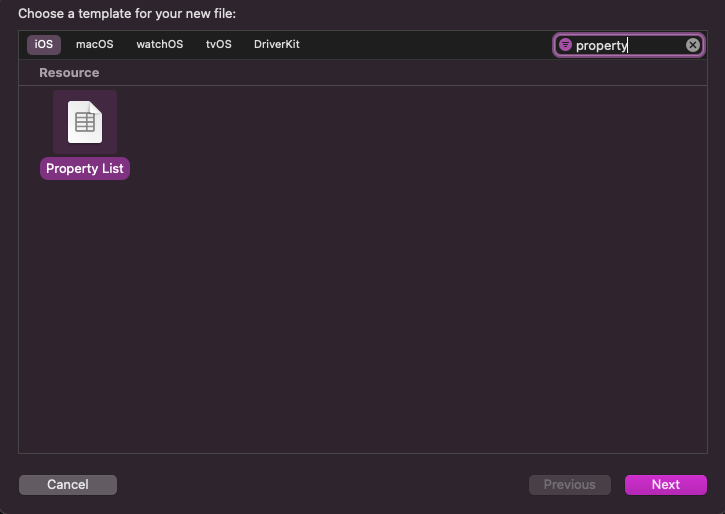
Next Create the Products.plist where you are going to list your products:
Create new file -> Search for property and choose Property List. I named mine: "Products"
When the app initializes a store, the system reads Products.plist and uses the product identifiers to request products from the StoreKit testing server.
Create the items you are selling
On the Products.plist create the products such as the image below.

Make sure the Key matches the Product ID of the product on the App Store, example:

Add the products for testing
The example above by apple has this implemented in case you want to look at it.
