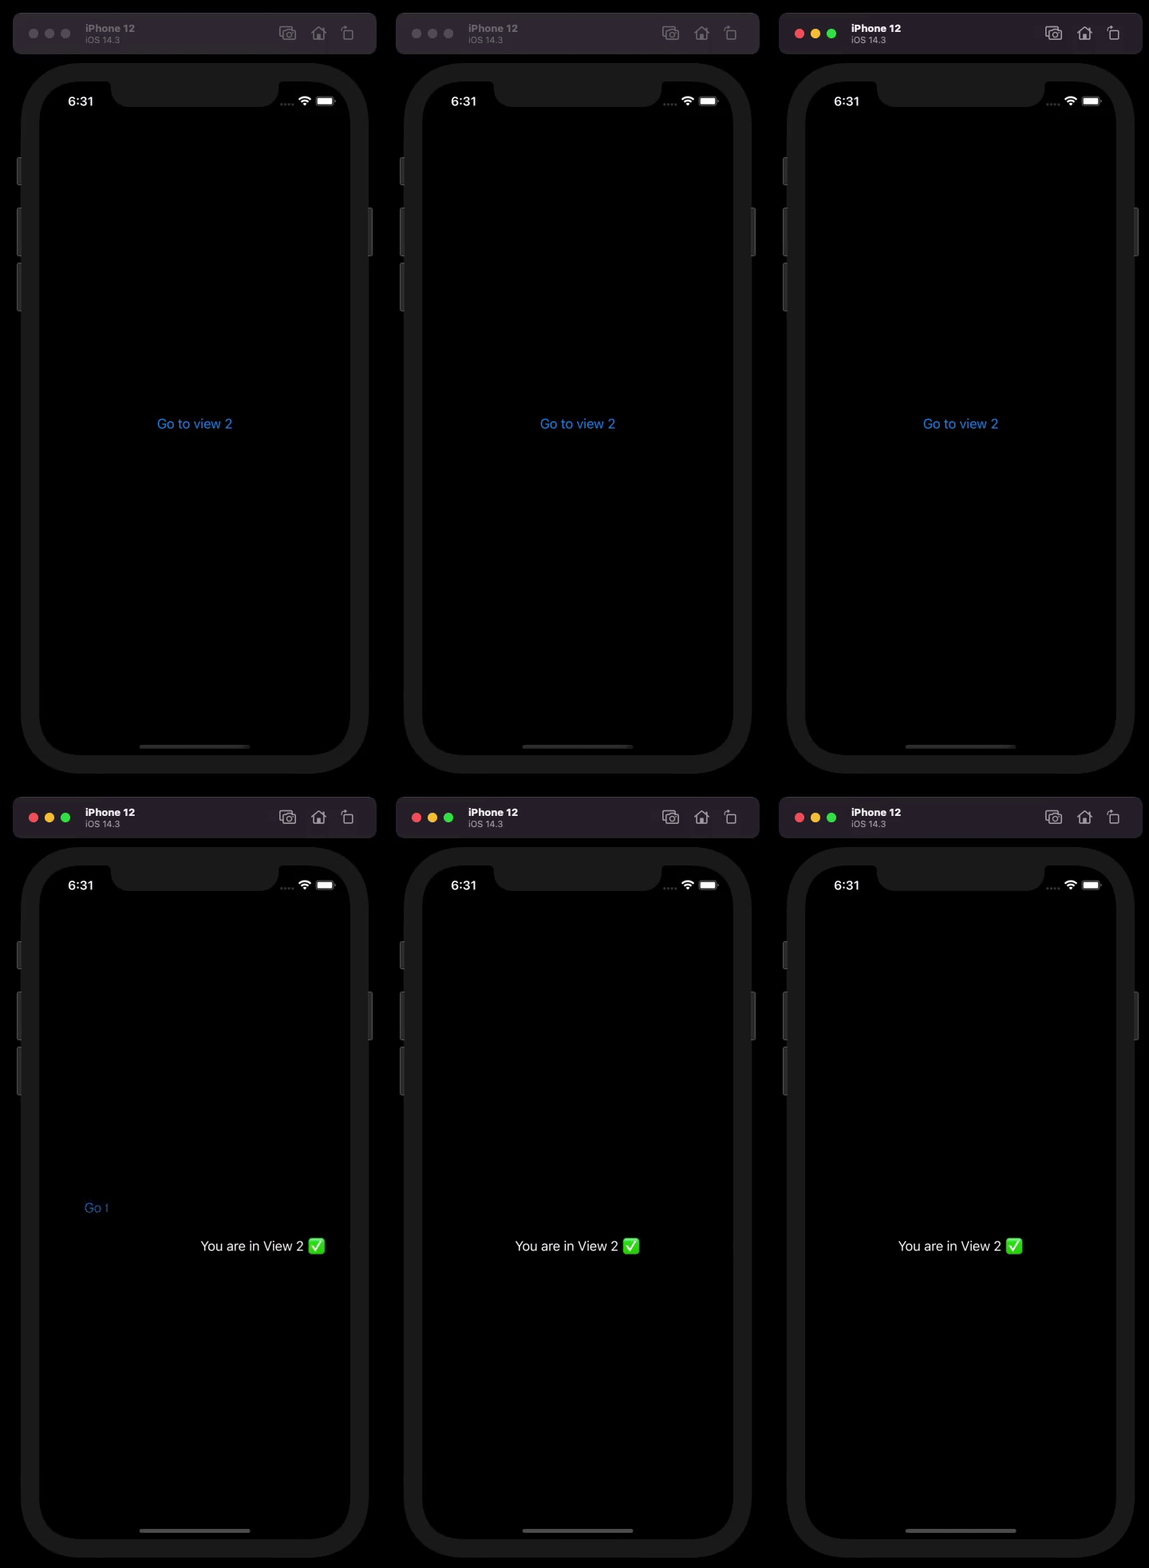
There are many ways to interact with different screens (views), here I'll cover them all with examples and pictures. Simple and concise.
SwiftUI recently introduced a new way to navigate . Here's a small example with a full Navigation controller:
Navigation Manager and NavigationTaggable
We need to manage our navigation in a reusable and scalable way, for this, let's create a manager that can handle the navigation operations for us and allows us to access it on any view using the environment object:
import SwiftUI

// Custom Navigation Manager
@MainActor
class NavigationManager: ObservableObject {
    // The navigation path that keeps track of your view hierarchy
    @Published var path = NavigationPath()

    // Push a new view onto the navigation stack
    func push<T: Hashable>(_ value: T) {
        path.append(value)
    }

    // Pop the last view from the navigation stack
    func pop() {
        if !path.isEmpty {
            path.removeLast()
        }
    }

    // Pop to the root view of the navigation stack
    func popToRoot() {
        if !path.isEmpty {
            path.removeLast(path.count)
        }
    }
}

// NavigationTaggable is a protocol that provides a unique tag value for views
// used in a custom navigation stack. This ensures that each view has a unique
// identifier when it's pushed or popped in the navigation stack.
// Usage:
//
// Conform a view to NavigationTaggable:
// struct MyView: View, NavigationTaggable {
//     // ...
// }
//
// Use the tagValue property when adding the tag to the view:
// MyView()
//     .tag(MyView.tagValue)
//
// This will ensure that each view has a unique identifier in the navigation stack.
protocol NavigationTaggable: Hashable {
    static func == (lhs: Self, rhs: Self) -> Bool
    func hash(into hasher: inout Hasher)
}

// The default implementation of NavigationTaggable generates a unique tag value
// based on the view's type name and a unique identifier suffix. This guarantees
// that the tag value will be unique as long as the type names are unique.
extension NavigationTaggable {
    // Generate a unique tag value based on the type name and a unique identifier suffix.
    // This guarantees that the tag value will be unique as long as the type names are unique.
    static var tagValue: AnyHashable {
        return String(reflecting: Self.self) + "_UniqueIdentifier"
    }

    // Default implementation of the equality function, which compares the hash values of lhs and rhs.
    static func == (lhs: Self, rhs: Self) -> Bool {
        var lhsHasher = Hasher()
        var rhsHasher = Hasher()

        lhs.hash(into: &lhsHasher)
        rhs.hash(into: &rhsHasher)

        return lhsHasher.finalize() == rhsHasher.finalize()
    }

    // Default implementation of the hash function, which combines the unique tag value into the hasher.
    func hash(into hasher: inout Hasher) {
        hasher.combine("\(Self.self)_UniqueIdentifier")
    }
}
import SwiftUI

struct SessionControllerView: View {

    @StateObject var navigationManager = NavigationManager()

    var body: some View {
        NavigationStack(path: $navigationManager.path) {
            TestView()
                .tag(TestView.tagValue)
        }
        .environmentObject(navigationManager)
    }
}

struct TestView: View, NavigationTaggable {

    @EnvironmentObject var navigationManager: NavigationManager

    var body: some View {
        VStack {
            NavigationLink(value: TestView2.tagValue) {
                Text("Navigate to View 1")
            }
        }
        .navigationDestination(for: AnyHashable.self) { value in
            if value == TestView2.tagValue {
                TestView2()
                    .tag(TestView2.tagValue)
            } else {
                EmptyView()
            }
        }
    }
}

struct TestView2: View, NavigationTaggable {

    @EnvironmentObject var navigationManager: NavigationManager

    @State private var navigate = false
    @State private var readyToNavigate = false

    var body: some View {
        VStack {
            Button("Toggle Navigation") {
                navigate.toggle()
            }.padding()

            Button("Validated, navigate now") {
                readyToNavigate.toggle()
            }.padding()

            NavigationLink("Navigate if toggled", value: navigate ? TestView2.tagValue : nil)
                .padding()

            Button("Pop View") {
                navigationManager.pop()
            }.padding()

            Button("Pop to Root View") {
                navigationManager.popToRoot()
            }.padding()
        }
        .navigationDestination(isPresented: $readyToNavigate) {
            TestView2()
                .tag(TestView2.tagValue)
        }
    }
}
and just like that we can have 2 different ways of calling the navigation view:
- Through automatic triggering once a flag changes to true
- Through controlled flag to enable/disable the navigation button
Another option to use NavigationLinks is by setting it directly on the view like:
NavigationLink(destination: MyOtherView()) {
    Text("Go to other view")
}
I'm personally leaning more towards the first option instead of this one as it's more scalable in case I need to add some logic to the button.
NavigationLink
Demo

We can do the above with the following code:
If you want to have the "Go Back" button removed, add .navigationBarBackButtonHidden(true)ContentView
import SwiftUI

struct ContentView: View {
    var body: some View {
        NavigationView {
            VStack {
                NavigationLink(destination: SecondView()) {
                    Text("Second View")
                }
             }
            .hideNavigationBar()
        }
    }
}
SecondView
import SwiftUI

struct SecondView: View {
    var body: some View {
        VStack {
            Text("You are in View 2 ✅")
        }
        .navigationBarBackButtonHidden(true)
    }
}
Extension
import SwiftUI

struct HiddenNavigationBar: ViewModifier {
    init() {
        UINavigationBar.appearance().setBackgroundImage(UIImage(), for: .default)
        UINavigationBar.appearance().shadowImage = UIImage()
    }

    func body(content: Content) -> some View {
        content
            .navigationBarTitle("Back", displayMode: .inline)
            .navigationBarHidden(true)
    }
}

extension View {
    func hideNavigationBar() -> some View {
        modifier( HiddenNavigationBar() )
    }
}

