To set up a domain name, you need to do two things. First, you need to purchase a domain name from a domain name registrar. Second, you need to set up DNS records for your domain by using a DNS hosting service.
I'm going to use DigitalOcean as example. Is not a domain name registrar, but does provide a DNS hosting service.
This is what you will need (name servers):
DigitalOcean name servers:
ns1.digitalocean.com
ns2.digitalocean.com
ns3.digitalocean.com
Add a Domain
- From the Control Panel locate Domains/DNS
- In the Add a domain section, enter the domain. This is typically the base domain only, e.g. example.com and not www.example.com. Subdomains are added by creating specific DNS records after the base domain has been added.
- Click Add Domain. This will take you directly to the Create new record page
Change Nameservers with your Registrar: One-time Only
When you are ready to change to using DigitalOcean to manage your DNS records, you’ll need to point to the DigitalOcean name servers from your registrar. This is different for every registrar.
Let's look at GoDaddy:
-
Sign in to your GoDaddy account.
-
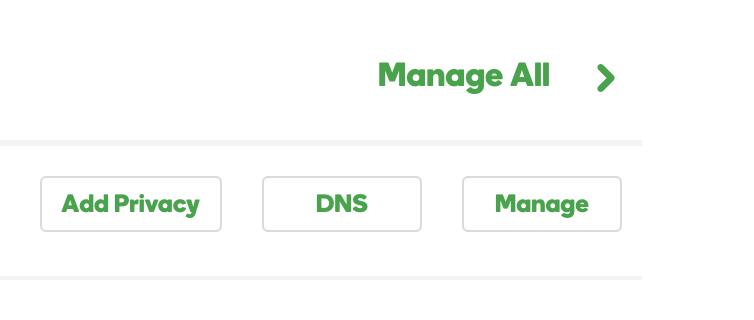
On your account homepage, click the DNS tab on the right-hand side of the Domains main page. It will be located in between the Add Privacy and Manage tabs.
-
On the next screen, navigate to the section of the page that reads Nameservers. Click Change.
-
When prompted, select Custom from the drop-down menu, and enter the following nameservers:
ns1.digitalocean.com
ns2.digitalocean.com
ns3.digitalocean.com
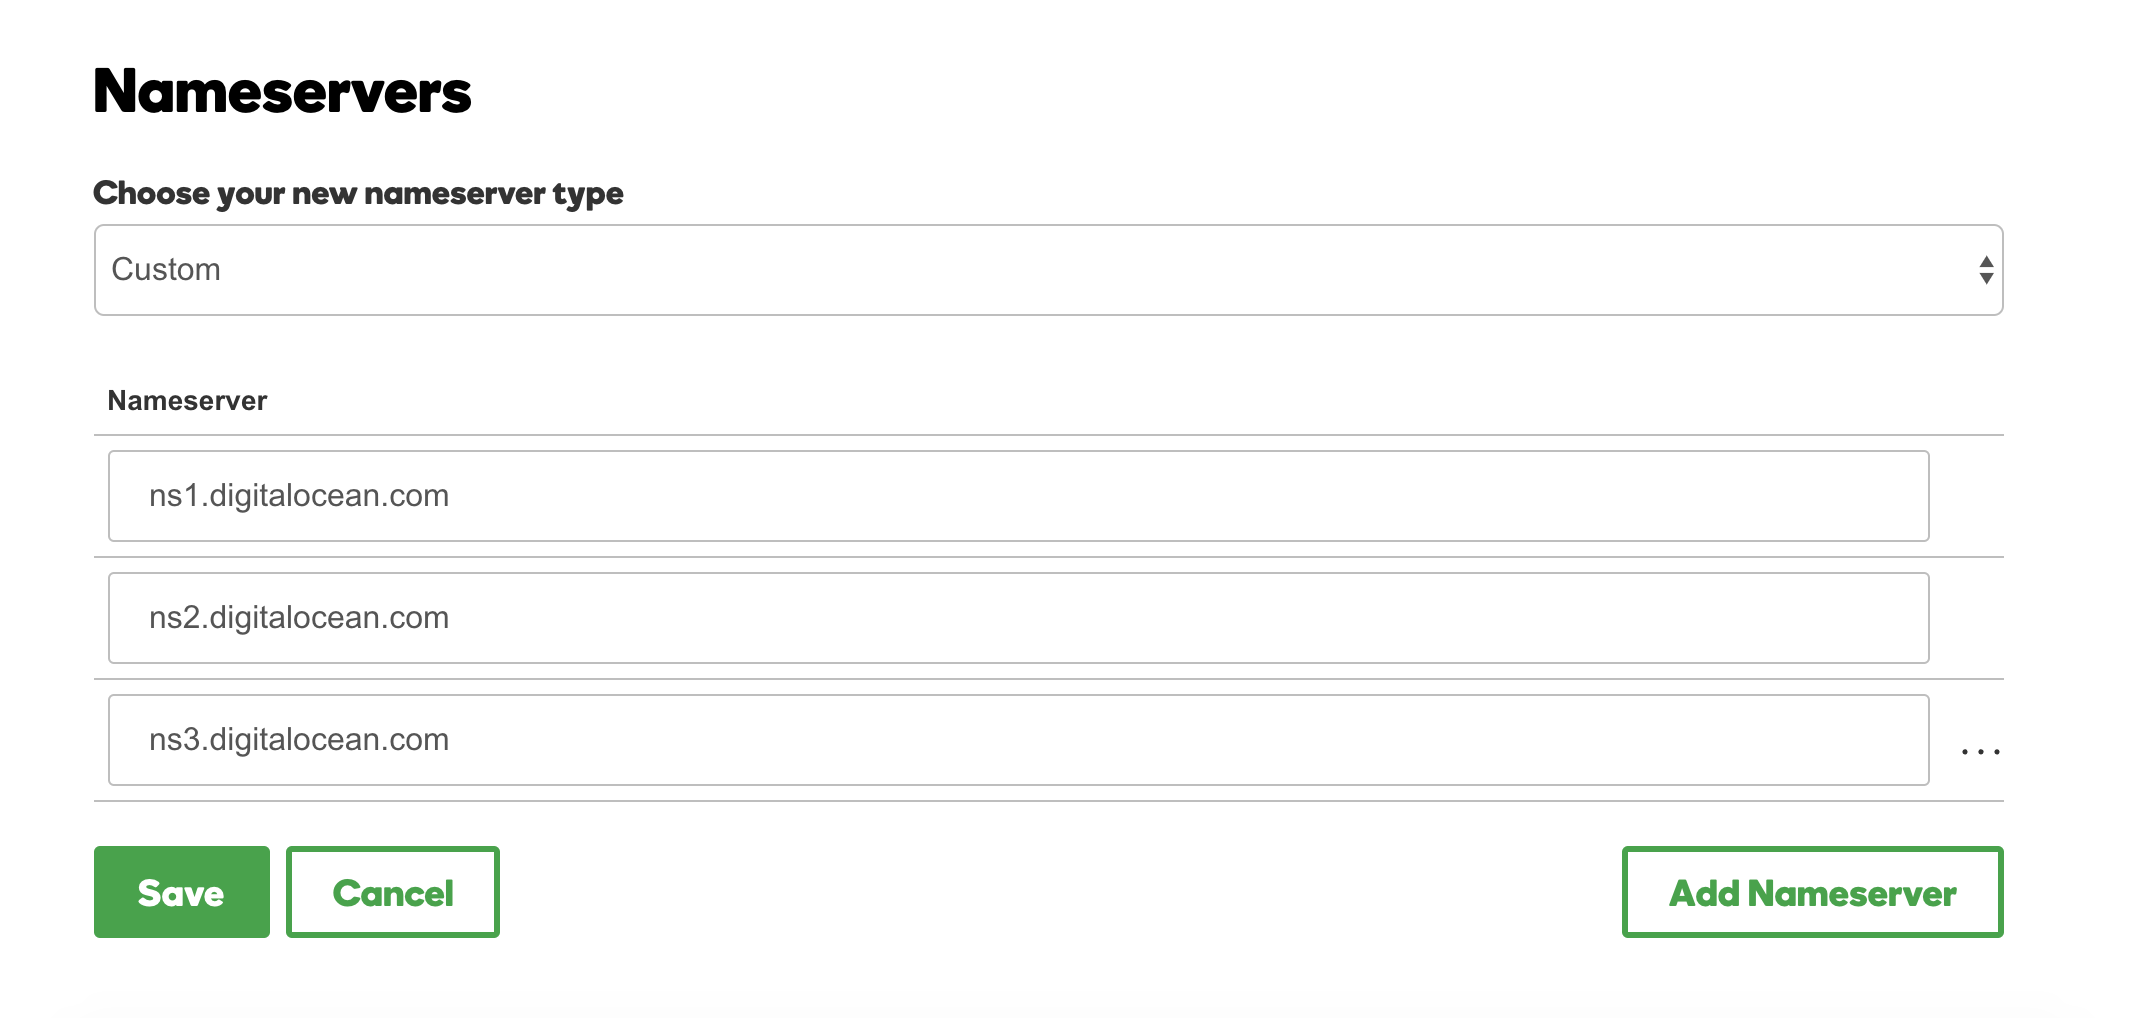
Note that you will have to click Add Nameserver to add the last entry. Click Save to apply your changes.
- Now you are ready to move on to connecting the domain with your Droplet in the DigitalOcean control panel. Check out the Conclusion section at the end of this article to find out about what to do next.
What's next?
Check out this Index page
