
Introduction
When you first create a new Ubuntu 16.04 server, there are a few configuration steps that you should take early on as part of the basic setup. This will increase the security and usability of your server and will give you a solid foundation for subsequent actions.
Step 1 — Root Login
To log into your server, you will need to know your server's public IP address. You will also need the password or, if you installed an SSH key for authentication, the private key for the "root" user's account.ssh root@your_server_ip
The root password will be emailed uppon instance creation.
Step 2 — Install some needed libraries.
To log in as root, type: sudo -i, that way you can execute the command line below, in some servers the access is different. Let's update:apt-get update && apt-get dist-upgrade -y
Note: dist-upgrade is similar to upgrade but handles dependencies and conflict-resolution better.
Log out of the root account: exit
Add to the list anything you may want.sudo apt-get install -y apt-transport-https ca-certificates curl software-properties-common gnupg unzip build-essential libssl-dev libffi-dev git nginx gcc g++ curl systemd make
Step 3 - Create a new user (optional)
Create a new user and follow promptssudo adduser arturo
Add user to superuser group to unlock admin privilegessudo usermod -aG sudo arturo
Log in as the new usersu - arturo
The gpasswd command is used to administer /etc/group, and /etc/gshadow. Every group can have administrators, members and a password. The -a means add user.
The usermod command modifies the system account files to reflect the changes that are specified on the command line. The -a adds the user to the supplementary group(s) and -g refers to the group name or number of the user's new initial login group. The group must exist.
Add read/write privileges to group sudo, set the correct permissions on /var/www, this will also allow you to upload to /var/www/ via SFTP:sudo chgrp -R sudo /var/wwwsudo chmod -R g+w /var/www
Now make sure your ubuntu user own it: sudo chown -R ubuntu /var/www
Additionally, you should make the directory and all directories below it "set GID", so that all new files and directories created under /var/www are owned by the sudo group:sudo find /var/www -type d -exec chmod 2775 {} \;
Find all files in /var/www and add read and write permission for owner and group:sudo find /var/www -type f -exec chmod ug+rw {} \;
Step 5 — Set Up a Firewall
Ubuntu 16.04 servers can use the UFW firewall to make sure only connections to certain services are allowed. We can set up a basic firewall very easily using this application.
Making sure you have installed UFW: sudo apt-get install ufw -y
Setting Up Default Policies:
If you're just getting started with your firewall, the first rules to define are your default policies. These rules control how to handle traffic that does not explicitly match any other rules. By default, UFW is set to deny all incoming connections and allow all outgoing connections. This means anyone trying to reach your cloud server would not be able to connect, while any application within the server would be able to reach the outside world.
Let's set your UFW rules back to the defaults so we can be sure that you'll be able to follow along with this tutorial. To set the defaults used by UFW, use these commands:sudo ufw default deny incomingsudo ufw default allow outgoing
These commands set the defaults to deny incoming and allow outgoing connections. These firewall defaults alone might suffice for a personal computer, but servers typically need to respond to incoming requests from outside users. We'll look into that next.
We need to make sure that the firewall allows SSH connections so that we can log back in next time. We can allow these connections by typing:sudo ufw allow ssh sudo ufw allow http sudo ufw allow https
Afterwards, we can enable the firewall by typing:sudo ufw enable
You can see that SSH connections are still allowed by typing:sudo ufw status
This will create firewall rules that will allow all connections on port 22, which is the port that the SSH daemon listens on by default. UFW knows what SSH and a number of other service names mean because they're listed as services in the /etc/services file.
Step 6 — Configure Timezones and Network Time Protocol Synchronization
The next step is to set the localization settings for your server and configure the Network Time Protocol (NTP) synchronization.
The first step will ensure that your server is operating under the correct time zone. The second step will configure your system to synchronize its system clock to the standard time maintained by a global network of NTP servers. This will help prevent some inconsistent behavior that can arise from out-of-sync clocks.
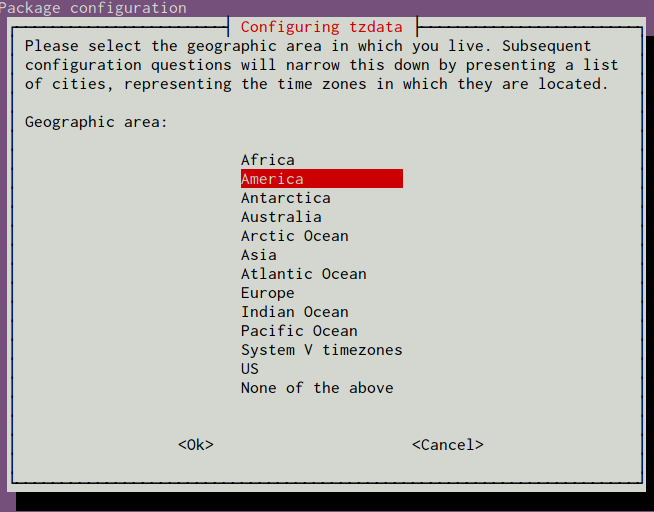
Configure Timezonessudo dpkg-reconfigure tzdata
You will be presented with a menu system that allows you to select the geographic region of your server:
After selecting an area, you will have the ability to choose the specific time zone that is appropriate for your server:
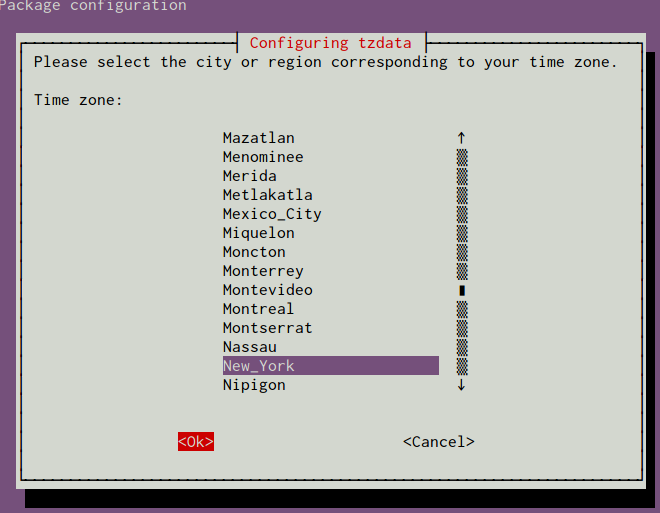
Next, we will move on to configure NTP.
Configure NTP Synchronization
Now that you have your timezone set, we should configure NTP. This will allow your computer to stay in sync with other servers, leading to more predictability in operations that rely on having the correct time.
For NTP synchronization, we will use a service called ntp, which we can install from Ubuntu's default repositories:sudo apt-get updatesudo apt-get install ntp
Take a Snapshot of your Current Configuration
